
Coaching Directors and Coaches have great training materials they have used
successfully in the past they need to share training with coaches and
player(s). These next three articles will demonstrate the process used to
create media elements (videos, links to other systems, Images, Documents,
Audio) and incorporate them into your practice plans right along with the
MOTI 3D media elements.
Creating Organization or Team videos to share:
Directors and coaches depending on the system rights provided by
their subscription my upload and make videos available to other coaches and
or players.
There are several things you must be aware of while creating your media
elements for sharing with other coaches and players.
Make the Content Acceptable to all.
- In the MOTI Terms and Conditions you accepted when you signed in to our
system. - You are asserting you own or have permission to put the material on the
web for public consumption of your coaches, parents and players and you
are not violating any copyrights. - The material you are putting on our system contains content you or your
organization has approved of with respect to not being offensive to any
parties accessing your content - Does not violate any terms you’ve agreed to by signing into our system
Uploading a video:
MOTI provides for directors and coaches with permission to upload video
content.
We recommend this be accomplished via a laptop ot desktop browser as
addressing the media file location is much simpler.
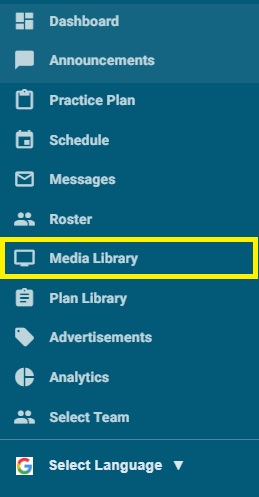
1. Select the MEDIA LIBRARY from the Menu Options
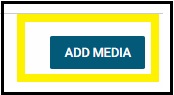
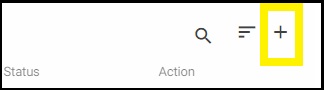
2. Click either the ADD MEDIA Button at the bottom of the Media Library display or the “+” in the upper right and side of the Media Library List
ADD Media Screen:
The next few steps will involve completing the information about your media
element “video” for uploading and accessing in the system.
3. Complete the following information for the video you wish to upload:
- Title – make this identifiable as to the team or organization it belongs to and what it represents, keep it short as it need to be able to be seen on a mobile device.
Example: “MOTI U6 Team – Scramble Exercise”
- Media Description – This may be an extended description as to what the
video contains. - Language – Select the language the audio component of your video is in
- Media File – You will use the browse button to select the file to
be uploaded. Acceptable video formats allowed are MOV, MP4 - Category – This is a drop down box that enables you to select the type
of media you are adding to the system. Select “Video”
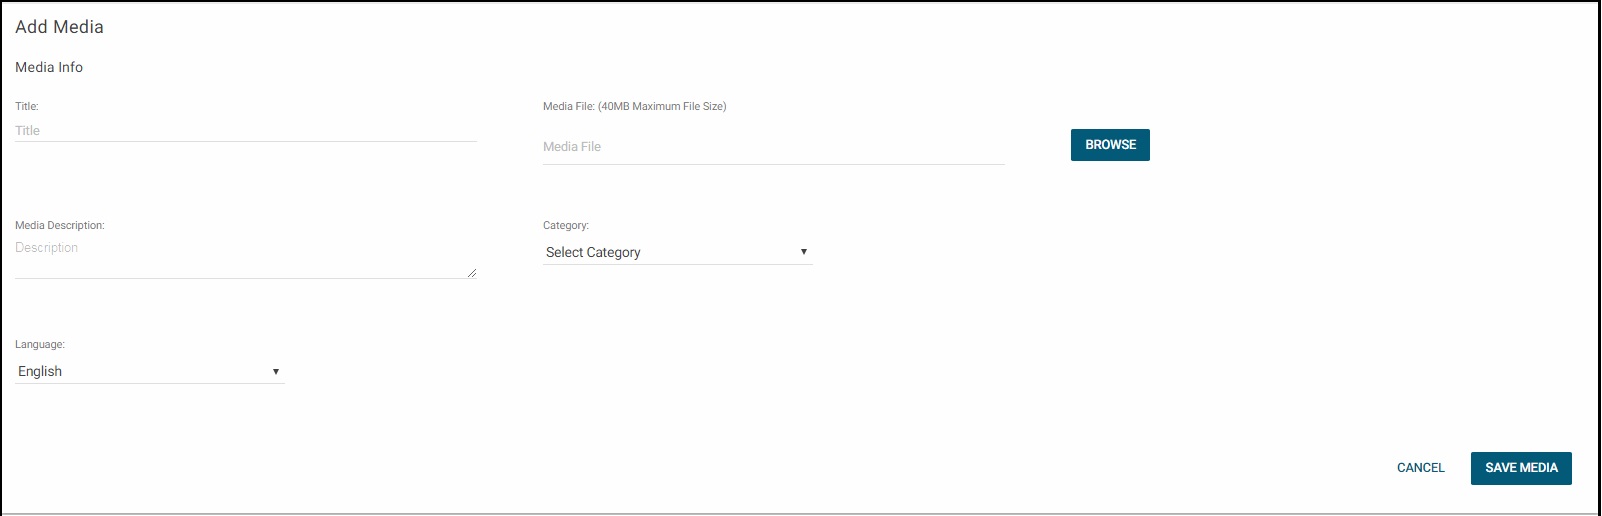

4. When you have entered the information, click “SAVE MEDIA” at the bottom of the Media Add page to have your media element video uploaded and saved

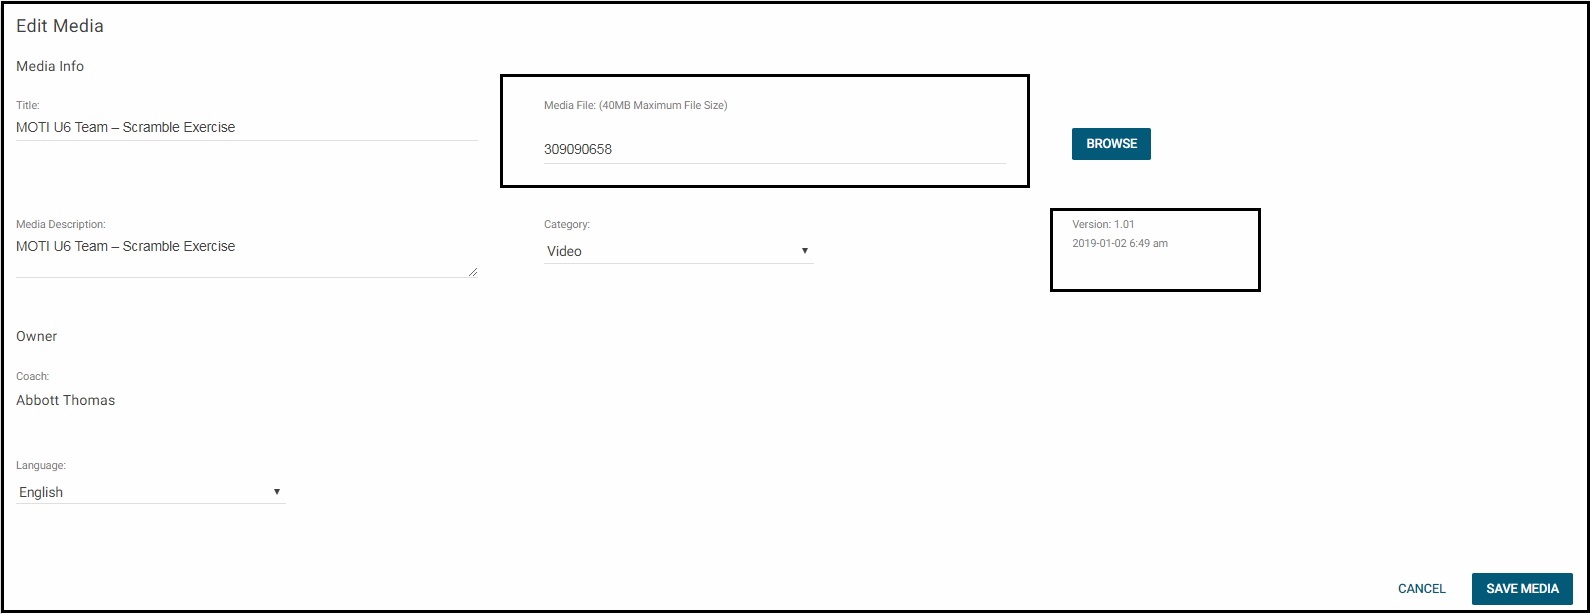
NOTE:
This will take some time to accomplish so be patient and watch the progress
indicator on your web browser. Once upload is successfully completed:
- the screen will refresh and change to the Edit Medias screen vs the Add
Media screen - the Media File name will display a reference number vs the file name
and location on your system - the Version level and upload date and time will be displayed of this
media element.
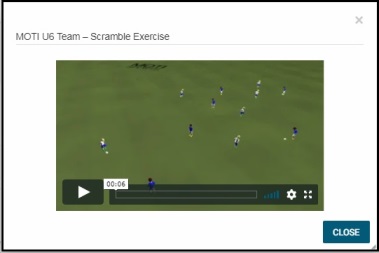
Displaying the Media Library once again, will show your media element as a
video with your organization name or coach name displayed.

Clicking on the media element will display and play the video in a window
within either the browser or mobile app
To be continued…

I have served in the capacity of the board-appointed leadership role (since 2014), and on the board since 2010. I farm in west-central Minnesota. My prior business background includes co-founder and owner of Davis, Thomas & Associates, Inc. (DTA) with offices in Minneapolis MN, Chicago IL, and Bangalore India. I was a former systems programmer in the banking, hospital, and transportation industries.